SwiftTracer - A physically based rendering engine
SwiftTracer is a Swift implementation of a physically based rendering engine inspired by PBRT, Mitsuba and many other contributors. It was built to support my research efforts as part of my master’s degree. The engine currently supports several image formats like png, jpg, pfm and exr. See for yourself on github.
But what does “physically based” even mean? For one, we are interested in simulating the behaviour of light such that it respects the laws of physics. Kajiya first introduced the rendering equation which allows us to do just that with the help of techniques such as Monte Carlo integration. By accumulating several light paths randomly generated, we obtain an approximation of the light propagation within a scene. This approach can be used to represent complex light effects such as caustics and subsurface scattering.
Mathematical operations #
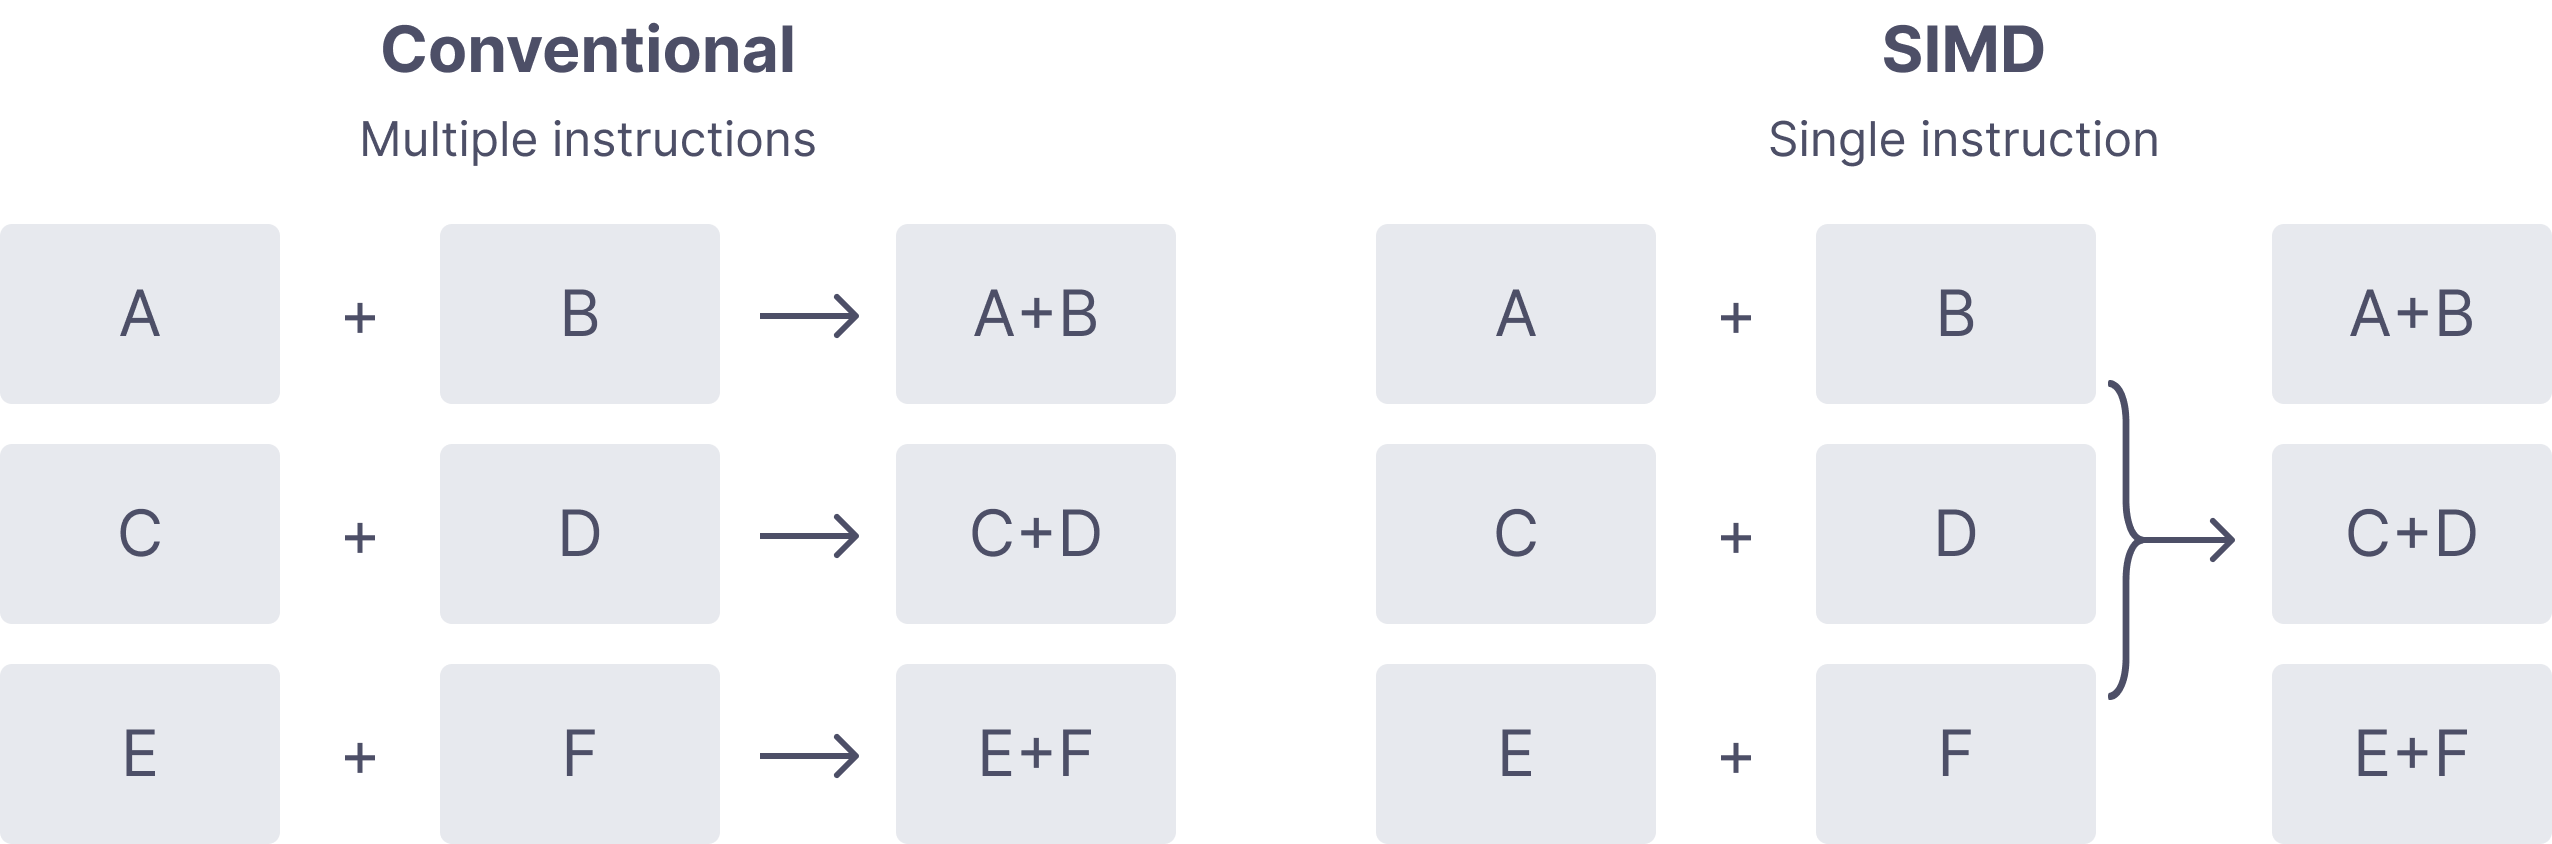
At its core, SwiftTracer uses simd to perform the mathematical computations: mostly vectors and matrices operations along with some trigonometry. Why does this matter? Because it turns out that ray tracing requires a lot of vector operations, both for image handling and the actual tracing. Imagine you want to sum the contributions of many images to get their average, or say, scale all of their values by a scalar. We would normally make such operations for each pixel. But since simd handles multiple data with a single instruction, it’s a perfect fit for this kind of problem. We can store an image as a vector of scalars, and use a single instruction to apply transformation on each of its elements.
While this is good enough for a large number of small mutations on vectors, applying transformations to large collections rather than 2 or 3 dimensional vectors still prove to be highly inefficient. For instance, a 1024x768 image will have 786,432 RGB elements to mutate when applying uniform scaling operations. Fortunately for us, the Accelerate framework comes with the vDSP module, and it is a perfect fit for our problem since it provides “general purpose arithmetic on large collections”. It follows the same principles as SIMD, only it is tailored to large datasets. Imagine we want to merge two images together. A naive approach would be to simply iterate over all of the pixels from the first image, get the corresponding pixel in the second image, calculate their sum and assign it to the pixel storage.
func merge(with other: Image) {
    for (i, value) in other.enumerated() {
        let current = storage[i]
        storage[i] = current + value
    }
}
But since we know the two images store their pixels with the same number of elements ordered identically, vDSP allows us to make that elementwise sum much more efficient with just about the same amount of code (less even).
func merge(with other: Image) {
    storage = vDSP.add(other.storage, self.storage)
}
Now, this comes with a caveat, and it is that vDSP is much easier to set up with collections of scalar. For that reason, SwiftTracer’s implementation of a PixelBuffer uses an array of Float instead of an array of RGB pixels. What this mean is that in order to mutate the i-th element using our expected buffer[i] = value, we must hide away that representation from the user.
subscript(i: Int) -> Color {
    get {
        let index = i * 3
        return Color(storage[index], storage[index+1], storage[index+2])
    }
    set {
        let index = i * 3
        let r = storage[index]
        let g = storage[index+1]
        let b = storage[index+2]

        storage[index] = newValue.x
        storage[index+1] = newValue.y
        storage[index+2] = newValue.z
    }
}
Parellel processing #
Rendering a full scene can take a lot of time. To speed up the process, SwiftTracer does as much of it as it can in parallel, thanks to the new async/await concurrency model introduced in Swift 5.5. We split our target image in a series of blocks, which run their own self-contained tracing task. First, we must decide on a block size and make an assemble function that will bring them back together as one image.
func render(scene: Scene) -> PixelBuffer {
    let image = PixelBuffer(
        width: scene.camera.res.x,
        height: scene.camera.res.y,
    )
    let gcd = DispatchGroup()
    gcd.enter()
    Task {
        defer { gcd.leave() }
        let results = await blocks(size: 32, res: scene.camera.res)
        return results.assemble(into: image)
    }
    gcd.wait()
    return image
}

extension Block {
    func assemble(into image: PixelBuffer) -> PixelBuffer {
        for block in self {
            for x in (0 ..< block.size.x) {
                for y in (0 ..< block.size.y) {
                    let (dx, dy): (Int, Int) = (
                        x + block.position.x,
                        y + block.position.y
                    )
                    image[dx, dy] = block.image[x, y]
                }
            }
        }
        return image
    }
}
Then we create a task for each of the block and start their integration process where the ray tracing happens. Depending on the chosen resolution and block size, we will spawn a varying number of rendering processes to run on their own core. The await keyword on line 2 tells us to wait the task to be completed before returning, and the one on line 17 to wait for all of the blocks to have finished their rendering.
 1func blocks(size: Int, res: Vec2) async -> [Block] {
 2    return await withTaskGroup(of: Block.self) { group in
 3        for x in stride(from: 0, to: res.x, by: size) {
 4            for y in stride(from: 0, to: res.y, by: size) {
 5                let actual = Vec2(
 6                    min(res.x - x, size),
 7                    min(res.y - y, size)
 8                )
 9                group.addTask {
10                    return integrate(size: actual, p: Vec2(x, y))
11                }
12            }
13        }
14        var blocks: [Block] = []
15        for await block in group {
16            blocks.append(block)
17        }
18        return blocks
19    }
20}
Finally, we can implement our own integration methods. The simplest version of that is a Monte Marlo estimation that computes the luminance $L$ with a unidirectional path tracing algorithm. For each pixel $(x, y)$ in the block, we will cast $n$ rays of light and average their total contributions by the number of samples $n$.
func integrate(size: Vec2, p: Vec2, samples n: Int = 5) -> Block {
    let img = PixelBuffer(width: size.x, height: size.y)
    var block = Block(position: Vec2(x, y), size: size, image: img)
    for lx in 0 ..< block.size.x {
        for ly in 0 ..< block.size.y {
            let x = lx + block.position.x
            let y = ly + block.position.y
            var avg = Color()
            for _ in (0 ..< n) {
                // Anti aliasing with a uniform noise (0 ... 1)
                let pixel = Vec2(x, y) + rng.next2()
                avg += li(pixel: pixel) // Compute path luminance
            }
            img[lx, ly] = avg / Float(n)
        }
    }
    block.image = img
    return block
}
Materials #
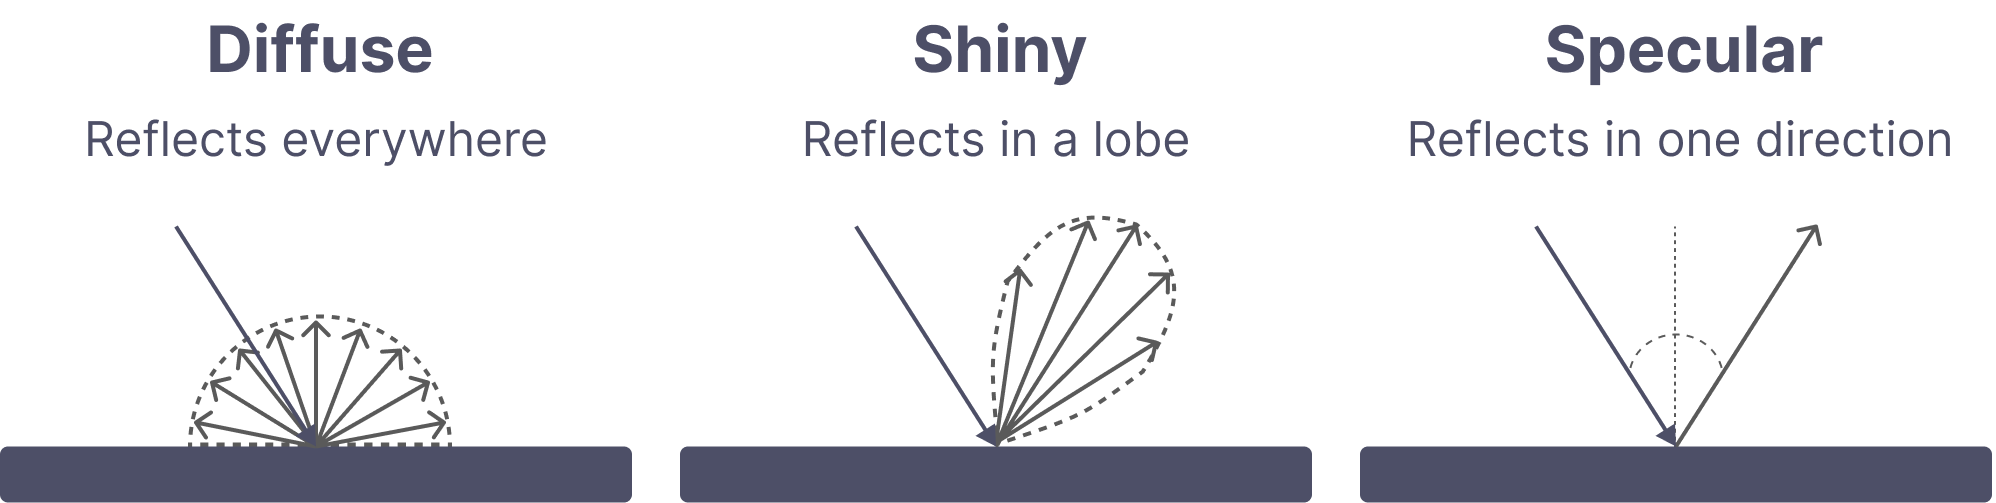
Whenever light collides with a surface, it will scatter differently based on the physical properties of that surface. For example, diffuse surfaces will reflect the light equally in all possible directions. On the other hand, shiny surfaces like metal or plastic will mainly reflect the light in the direction of a specular lobe. Perfectly specular surfaces will typically have only one possible reflection direction.
SwiftTracer currently implements 4 base materials, which use their own distribution functions to support light scattering. On top of these, it is possible to blend them with a linear combination of two different materials. The strength of the blend can be defined by an alpha parameter.
| Diffuse | Smooth metal | Rough metal | Glass | Blend |
|---|---|---|---|---|
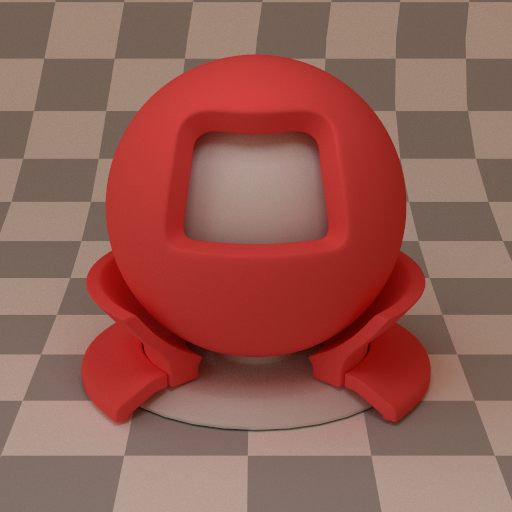 | 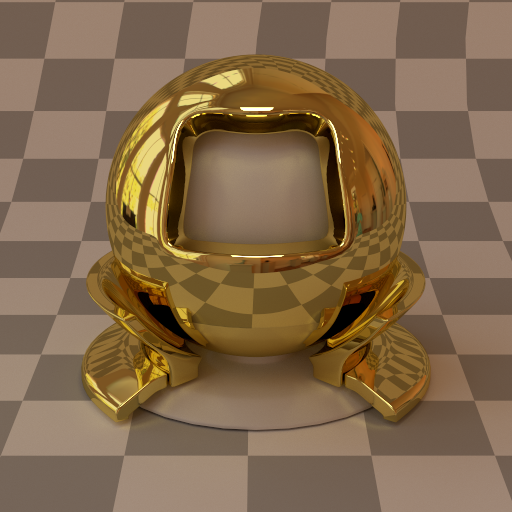 | 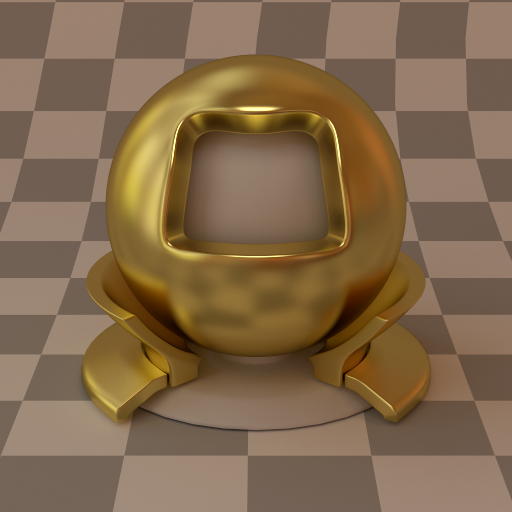 | 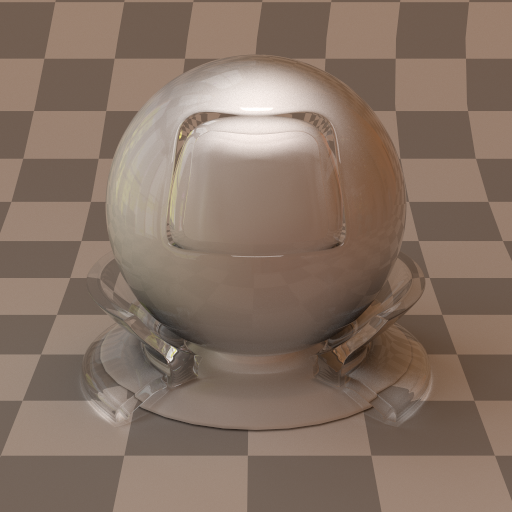 | 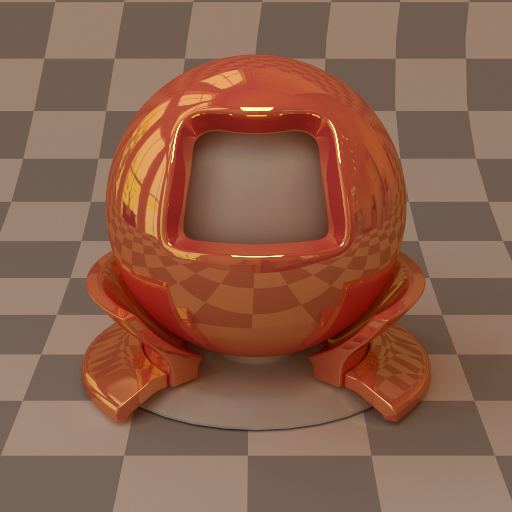 |
Geometry #
While any numbers of geometry like cylinders, disks, spheres could have been implemented, SwiftTracer supports only a few primitives, with a bigger emphasis on meshes and triangles. For light sources or quick tests, it can be convenient to have simple shapes available, so Quad and Sphere were also added to that end.
Mesh #
The only mesh format supported at the moment is wavefront (obj). To drive the parsing and loading process, I ported over to SwiftWavefront the most basic parts of TinyObj, a very popular C++ implementation. SwiftWavefront can be consumed as a swift package and offers ready to use meshes with vertices, normals and texture coordinates.
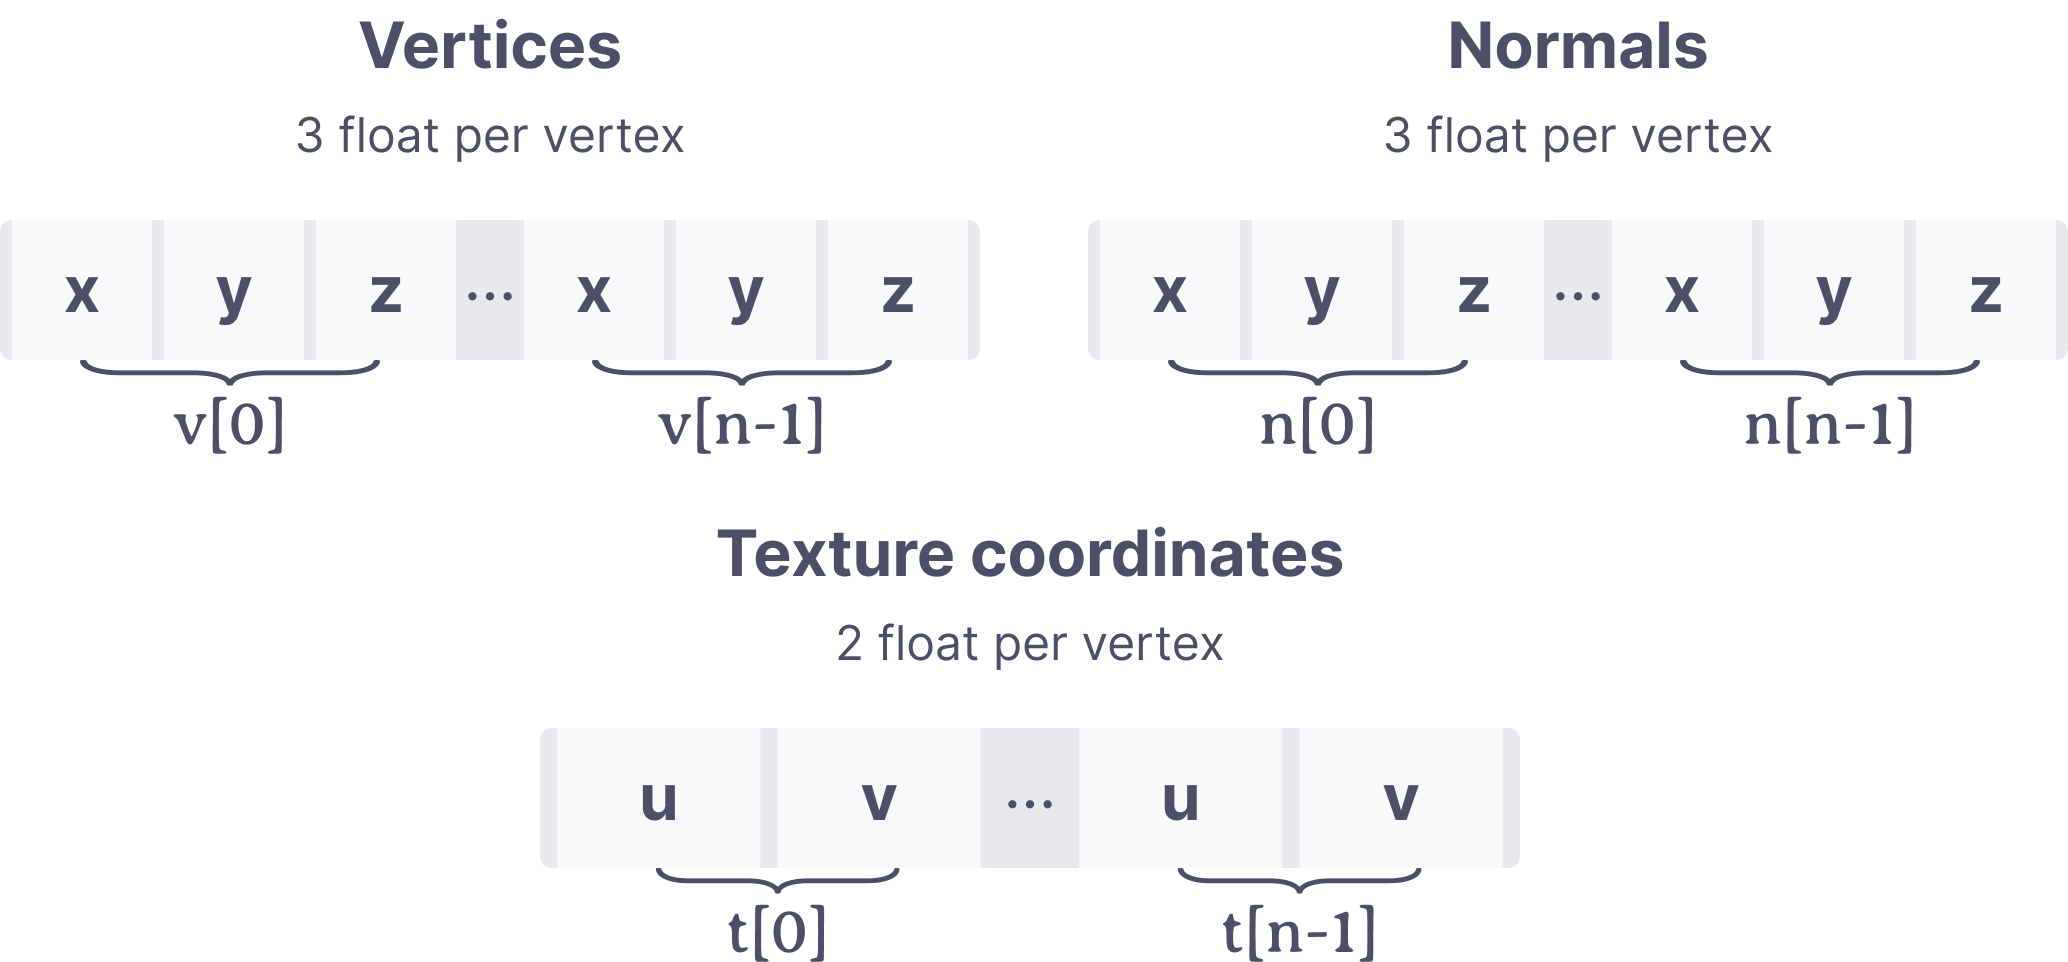
The conversion to triangles can be done by loading the obj and then assigning the data to triangles by using their own transform matrix.
let obj = Wavefront(filename: filename, encoding: .utf8)
positions = stride(from: 0, through: obj.vertices.count - 1, by: 3).map { i in
    let x = wavefront.vertices[i]
    let y = wavefront.vertices[i + 1]
    let z = wavefront.vertices[i + 2]
    return transform.point(Vec3(x, y, z))
}
The triangle intersection uses the Möller–Trumbore ray-triangle intersection algorithm. Vertices and normals are currently supported, but tangents will be added at a later time when I implement microfacets.
Loading generic objects #
The loading of my scenes relies heavily on the Codable protocol which has been available for a while, as well as a system of generic Any types that can be converted to their concrete implementation. You can feed a JSON to SwiftTracer and it will gracefully do the conversion from the boxed type to the concrete implementation.
To illustrate that process, imagine you have a generic type you want to decode like Material. It has several implementations which all require different properties to be decoded. We start with AnyMaterial, a box type definition that encapsulates the types it wants to decode and a generic wrapped entity. It also has some high level coding keys shared by all of the Material implementations.
struct AnyMaterial: Decodable {
    enum TypeIdentifier: String, Decodable {
        case diffuse
        case metal
        case dielectric
        case blend
    }
    enum CodingKeys: String, CodingKey {
        case type
        case name
        case params
    }

    let name: String
    let type: TypeIdentifier
    private(set) var wrapped: Material
}
Now let’s say we have a concrete implementation of that Material type called Diffuse. It needs an albedo property of the Texture type. Other materials don’t need that property so we define it here.
final class Diffuse: Material {
    enum CodingKeys: String, CodingKey {
        case albedo
    }

    let texture: Texture
    init(texture: Texture) {
        self.texture = texture
    }
    // ...
}
We can now decode that type in AnyMaterial and store it in the wrapped property without worrying about its concrete implementation.
init(from decoder: Decoder) throws {
    let container = try decoder.container(keyedBy: CodingKeys.self)
    self.type = try container.decode(TypeIdentifier.self, forKey: .type)
    self.name = try container.decodeIfPresent(String.self, forKey: .name) ?? ""

    switch type {
    case .diffuse:
        let params = try container.nestedContainer(keyedBy: Diffuse.CodingKeys.self, forKey: .params)
        let albedo = try params.decodeIfPresent(Texture.self, forKey: .albedo) ?? 0
        self.wrapped = Diffuse(texture: texture)
    }
}
Using this is now quite simple; we need a properly formatted JSON
{
    "materials": [{
        "name": "red-tint",
        "type": "diffuse",
        "params": { "albedo": [0.95, 0.1, 0.1] }
    }]
}
which can be decoded in the root container.
init(from decoder: Decoder) throws {
    let container = try decoder.container(keyedBy: CodingKeys.self)
    let generic = try container.decode([AnyMaterial].self, forKey: .materials)
    let materials = generic.reduce(into: [String: Material]()) {
        $0[$1.name] = $1.wrapped
    }
}